


 Exporting renders
Now that you created and adjusted your cameras, it's time to export the renders.
With NDunes, you can export several different renders according to your needs :
* Geometry mask (2D image)
* Plant mask (2D image)
* Environment map geometry mask (360° image)
* Environment map plant mask (360° image)
General configuration of the render batch
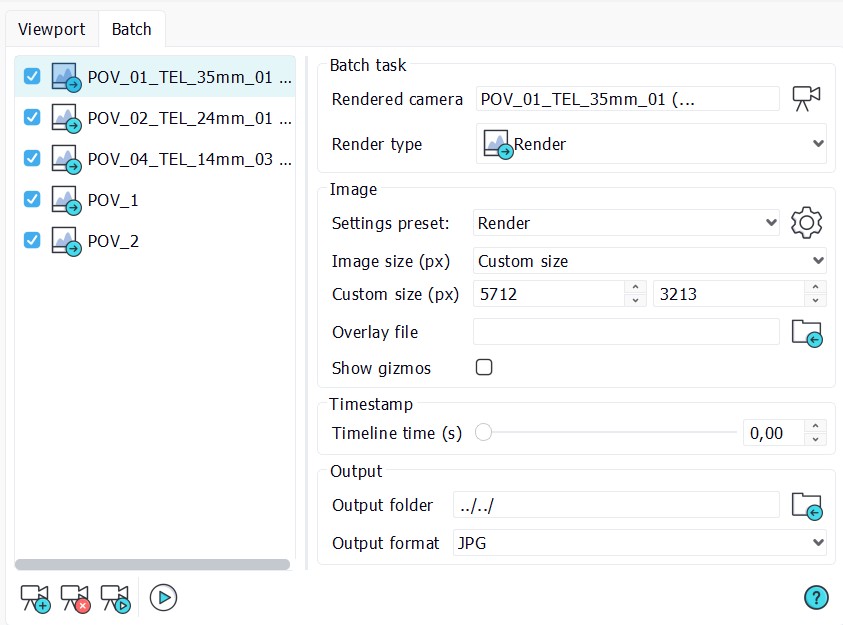
First, open up the Render batch by going to "Render" --> "Rendering setup" and opening the "Batch" tab.
Then, you need to add the camera(s) to the render batch. You can do it by choosing the camera in the caamera list on your toolbar to make it current aand then clicking on the "Add a task to the render batch" icon in the Render batch window. Or you can just drag & drop the camera(s) from your Scene tree into the Rendering batch window.
Configuring your cameras in the render batch for 2D photomontage
For a 2D photomontage, you need to export:
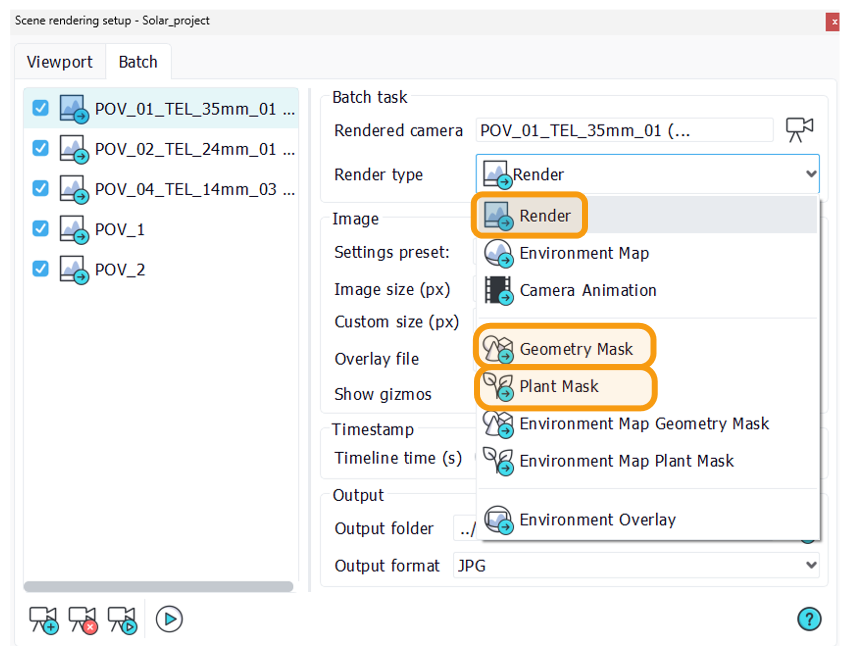
* A "Geometry mask"
* A "Plant mask"
* A "Render" image
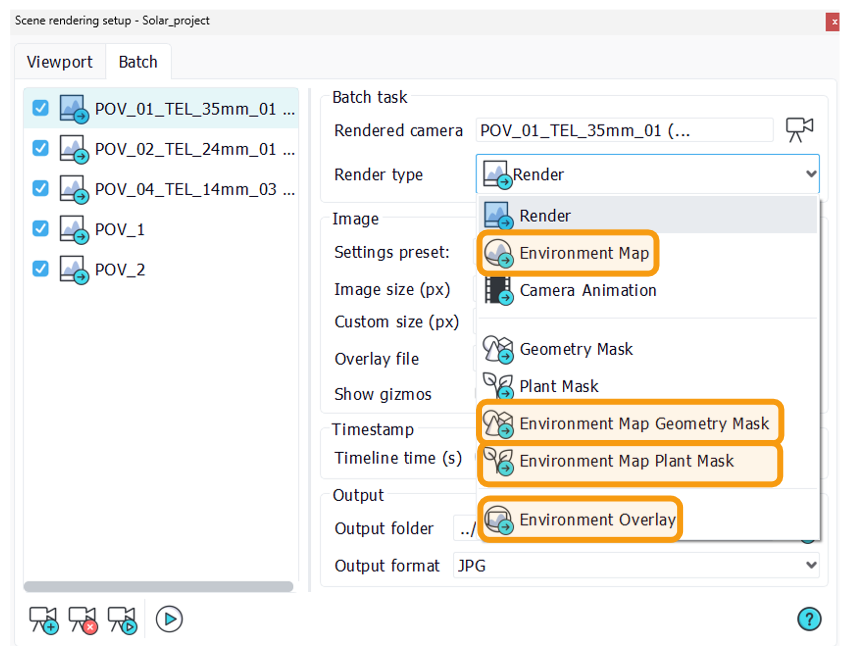
To do that, add the same camera three times into the render batch and set the "Render type" of each to the specific type.
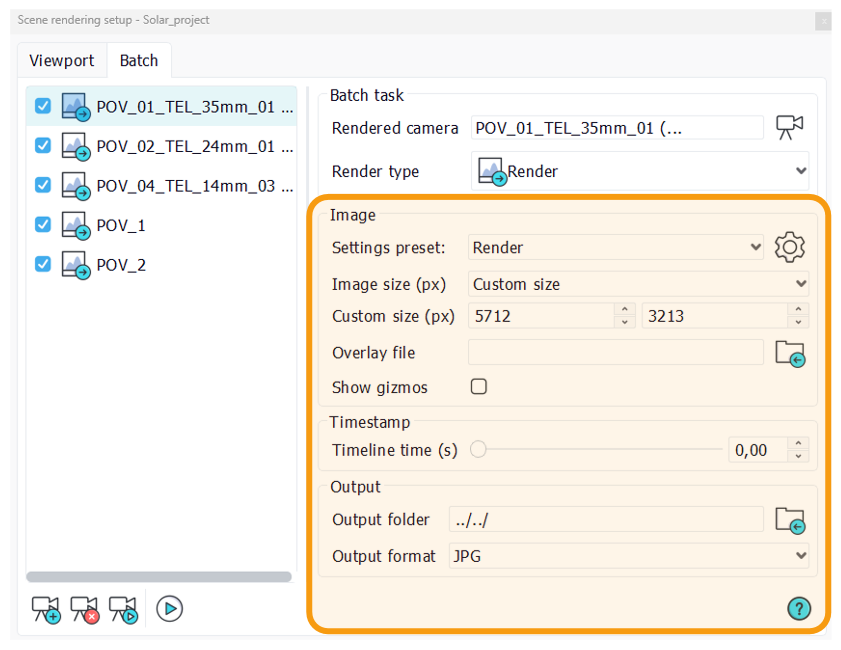
Of course, you can adjust the parameters of each of your cameras in the rendering batch like the resolution, the quality preset, etc on the right side of your rendering batch window
Now you can work in your preferred photo editor software on your photomontage.
Configuring your cameras in the render batch for a 360° photomontage
For a 360° photomontage, you need to export:
* An "Environment map geometry mask"
* An "Environment map plant mask"
* An "Environment map"
* An "Environment overlay"
To do that, add the same camera four times into the render batch and set the "Render type" of each to the specific type.
And just like for the 2D photomontage settings, you can adjust the parameters of each of your cameras in the rendering batch like the resolution, the quality preset, etc on the right side of your rendering batch window.
Environment overlay
The "Environment Overlay" is used to correct your 360 photo if it has any tilt. The result is the same 360 image as in the input but with the necessary adjustments applied to it.
You can adjust the tilt using the "Fly camera" in NDunes.
Note:
For more info about the "Fly camera" and how to tilt it, please refer to the Camera Fly mode page.
Now, with all your renders at hand, you can work in your preferred photo editor software on your photomontage.
 |
